
My pattern:
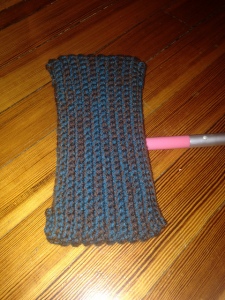
This duster comes out tight at first, but I have found that after a few uses it loosens up to be just the right size. As long as you can stretch it over the duster after you first make it, then it’s fine! For 5mm hook, I used two strands of medium weight yarn together.
All stitches are crocheted in the back loop only. This creates that ridge to help pick up dust!
-Create a slip knot, leaving a long piece of yarn for sewing the end flaps at the end of the project.
-Ch 46
-Row 1: Sc in second ch from hook, and sc across, ch1 and turn (45)
-Rows 2-21: Sc across (45)
21 rows works well so that the edge of the duster fits just over the Swiffer, making it easier to clean against base boards.
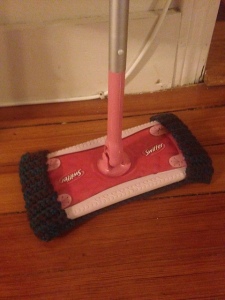
-Fasten off, leaving a long tail for sewing. Thread this yarn into yarn needle. From the last stitch crocheted on last row, count back 12-13 stitches and attach last stitch crocheted to this stitch. This creates the flap to attach to the Swiffer. Continue sewing so that the flap is completely attached to the long part of the Swiffer.
-Using the extra piece of yarn from the beginning of the project, sew the other side of this flap to match (about 13 total stitches of overlap).
-Attach yarn to the other side and create another flap that is the same size (13 stitches of overlap).

What a cool idea, Megan! If I could crochet I would definitely make one of these.
LikeLiked by 1 person
Thanks, Katie! You should learn how to crochet, it’s super easy 🙂
LikeLike